If your photo comes out looking a little dull some work in Lightroom can do wonders to make the colors pop and really bring the image to life. So let’s take a look at how you can easily make a sharp color pop effect in Lightroom. If you like this effect and you want to easily apply it to your own photos you can download a free preset here that will apply the settings used in this tutorial. The free preset is a sample from our set of Color Delight Lightroom Presets, which gives you a really big variety of different types of color effects that you can apply very easily.
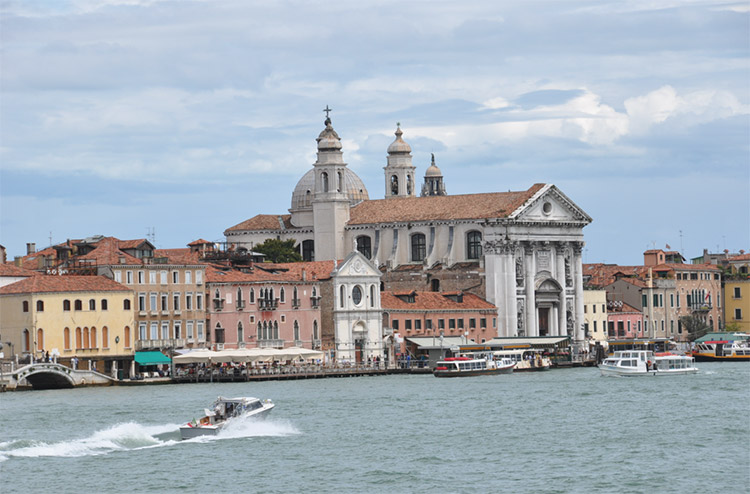
Here is the sample photo that I will be using throughout this tutorial.
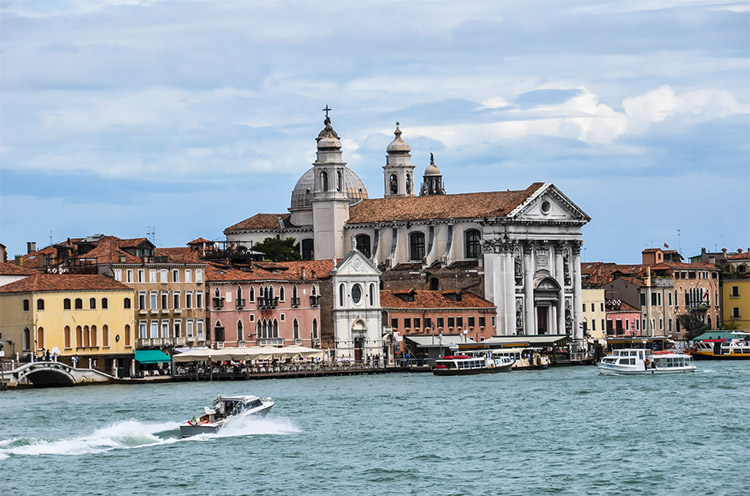
And here you can see the effect that we will be working towards.
To get started, use the following settings in the Basic section of Lightroom’s Develop Module:
- Contrast +20
- Highlights -15
- Shadows +20
- Whites +10
- Blacks -20
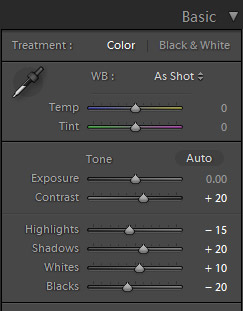
So we are adding some contrast, slightly increasing the dynamic ranges with the highlights and shadows settings, boosted whites, and reduced the black point.
Next, apply these settings:
- Clarity +60
- Vibrance +20
- Saturation +10
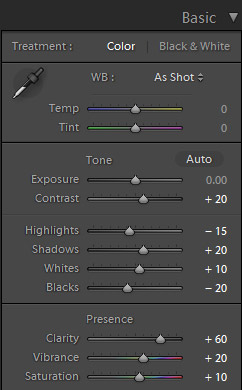
Here we are drastically boosting the clarity, which gives it a sharpened look, plus we’ve boosted the vibrance and saturation to add more color.
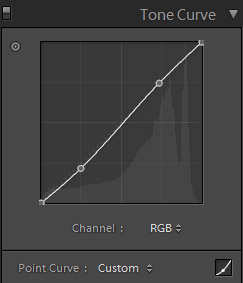
Next, we’ll work with the tone curve. Use a curve like the one below which will subtly increase contrast.
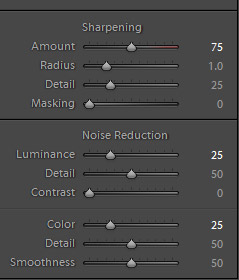
The next step is to go to the Detail section and apply some sharpening and noise reduction. Use these settings:
- Sharpening amount – 75
- Noise reduction luminance – 20
- Noise reduction color – 25
That completes our work and we are left with this photo.

So when you want to make colors pop and add some sharpness and intensity try using the following settings, or simply use the free preset.
