One of our most popular free Photoshop actions is the Faded Film Action, which can be used to give photos a nice subtle fade. Due to the popularity of that action we decided to put this tutorial together to show how you can create this look from scratch if you’d like. Of course, you can use the free action to get the effect, but it’s always helpful to understand the steps that an action takes to get a certain result.
We’ll be working with this sample photo for the tutorial.

And we’ll be working towards this end result.

Throughout the tutorial we will be adding several adjustment layers. If you’re not familiar with the process of creating a new adjustment layer it is really easy. All you need to do is click on the icon shown below, and then select the type of adjustment layer that you want.
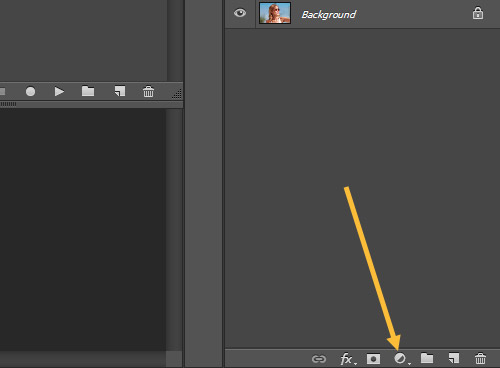
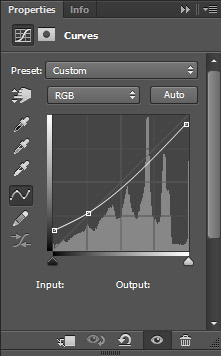
The first step is to create a curves adjustment layer, so click on that icon and then select “curves”. Then apply a curve like the one shown below. This curve will help to get the film effect, similar to a matte effect.
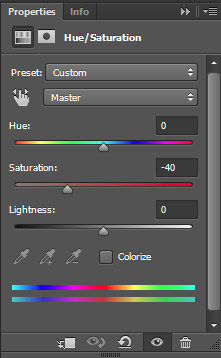
Next, create hue/saturation adjustment layer and set the saturation to -40.
These first two steps go a long way towards our film look, and at this point the photo looks like this.

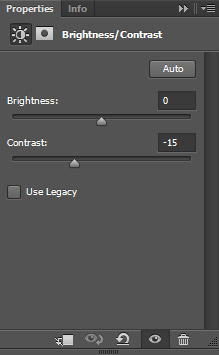
The third adjustment layer we’ll add is a brightness/contrast layer, and set the contrast to -15.
And our last adjustment layer will be a gradient map, so go ahead and add that one. You’ll want a gradient that will fade from blue, #7691cc, to a soft yellow, #fafb91.
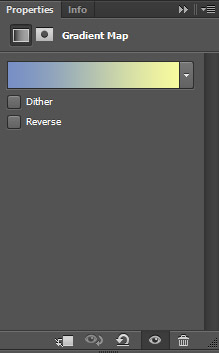
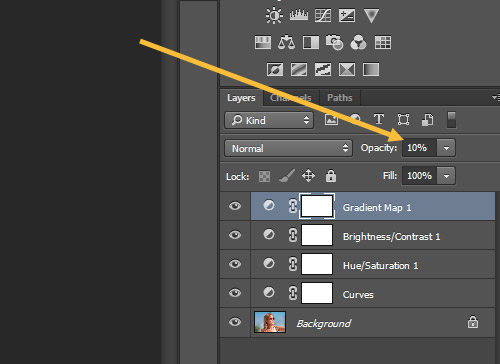
We’ll leave the blend mode of the gradient map set to normal, but change the opacity to 10% so it has only a very minor impact on the photo.
That completes the effect. Here is another look at the end result.
If you want to apply this effect to your photos very easily please download the free action.
